 Anacortes Window
 Burlington's Siding Climate, In Plain Terms
Burlington sits down in the Skagit Valley, close enough to Skagit Bay and the broader Puget Sound system to catch salt-laden air on a regular basis, and low enough in the valley floor that Pacific storm fronts push driving rain sideways into wall assemblies rather than straight down onto rooftops. Add in a moss season that runs long on shaded, tree-lined lots and north-facing walls, and you have three conditions working on a home's exterior at once, nearly every month of the year. Siding is the first line of defense against all three, which makes the material and the installation quality on a Burlington home matter more than they would in a drier, calmer part of the country.
None of this shows up as a single dramatic failure. It accumulates — a hairline gap at a window casing that wind-driven rain finds a little at a time, a shaded wall section that stays damp for days after everyone else's siding has dried out, a factory finish that starts to chalk years earlier than it should have. This page focuses specifically on James Hardie fiber cement siding for Burlington homes: what the product brings to this climate, what a correct installation actually involves, and why a crew that already works this area day to day makes a measurable difference.
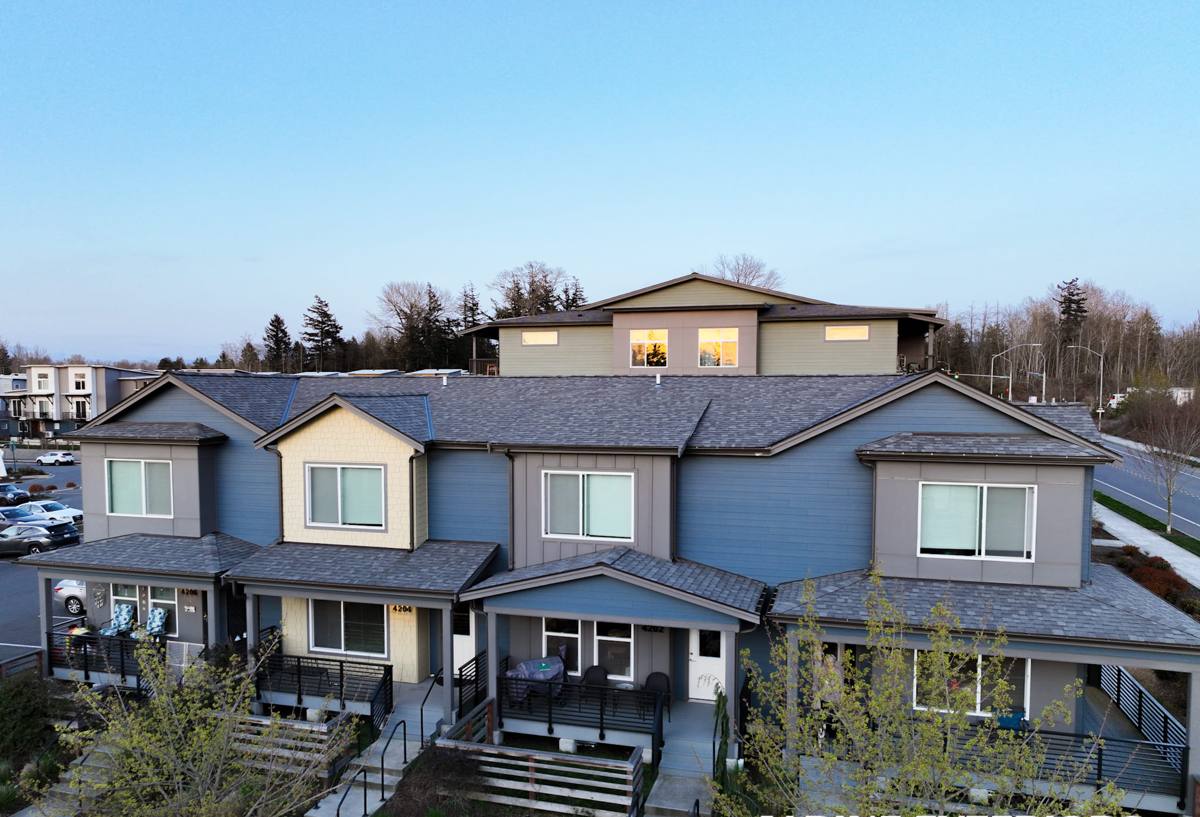
Why We Only Install James Hardie Fiber Cement
We install one siding product on every job: James Hardie fiber cement. We don't offer vinyl, LP SmartSide, Cemplank, Allura, primed spruce, or cedar siding, and that's a deliberate professional standard, not a limited catalog. Each of those alternatives does something well — vinyl is inexpensive, engineered wood installs fast, cedar has real natural character — but each also carries a trade-off we think matters too much in a climate like Skagit County's to put our name behind. Organic and semi-organic siding materials depend on flawless field sealing at every cut edge and joint to keep sustained moisture out, which is a demanding standard to hold across an entire crew, on every job, for decades.
What That Means for a Burlington Job
Fiber cement isn't organic, so it doesn't feed moss growth the way wood-based siding can, and it doesn't have a wood substrate for trapped moisture to work into over time. Because we install only one system, our crew isn't splitting attention across several very different materials with different fastening rules, different flashing tolerances, and different manufacturer warranties. Everyone on the job knows this product, this climate, and how the two interact — which is a big part of why the installation itself tends to hold up better here than a mixed-material approach.
The James Hardie Product Lines That Fit This Area
James Hardie doesn't sell one generic board nationwide — it engineers specific product lines around regional climate exposure, and the HZ5 line is built for regions like ours: cold, wet, and prone to repeated moisture cycling rather than one hard freeze-thaw season or one dry season. For Burlington homes we're generally working with HardiePlank lap siding for a traditional horizontal look, HardiePanel for a board-and-batten or modern vertical profile, and HardieTrim for window, door, and corner details that need to hold a crisp line for decades. Most of what we install carries the factory-applied ColorPlus finish rather than a primed board that depends on field paint, because a factory-cured finish holds up more consistently in a climate that doesn't offer much of a dry window for field painting to cure properly.
| Product | Typical Use | Why It Fits Burlington |
|---|---|---|
| HardiePlank (HZ5) lap siding | Traditional horizontal siding, most common home style | Engineered for sustained moisture and coastal-influenced climates |
| HardiePanel | Board-and-batten or vertical modern look | Fewer horizontal laps means fewer potential water entry seams |
| HardieTrim | Window, door, corner, and fascia detail | Holds a straight, stable line without the swelling wood trim can show |
| ColorPlus finish | Factory-applied color on any of the above | Cures under controlled conditions instead of a jobsite paint window |
| Primed (field-paint) option | Custom colors outside the ColorPlus palette | Available, but shifts finish durability onto field paint conditions |
What a Correct Hardie Installation Involves
The board itself is only half the equation. A well-engineered siding product installed with shortcuts will still fail early in a climate that punishes gaps and gives water plenty of chances to find them. Correct installation on a Burlington home means proper clearance from grade, decks, and patios, flashing integrated at every window, door, and roofline transition rather than caulked over afterward, fastener spacing and placement matched to the specific Hardie product and local wind exposure, and joint treatment that accounts for whether a given wall faces the sun most of the day or sits in shade for weeks at a stretch.
- Starter strip and bottom clearance set correctly so the lowest course never sits in standing moisture
- Window and door flashing lapped in the correct order with the water-resistive barrier, not applied as an afterthought
- Fastener type, spacing, and penetration depth matched to Hardie's published specifications for the product line
- Butt joints and seams treated differently on shaded, moss-prone walls than on sun-exposed walls
- Corner boards, trim, and utility penetrations sealed with a product-appropriate sealant, not generic caulk
- Factory ColorPlus finish protected and touched up with matched product at any field cuts or minor repairs
Our Installation Process, Step by Step
Assessment and Tear-Off
Every job starts with a look at what's actually behind the existing siding, not just what's visible from the driveway. On a re-side, tear-off is when hidden problems surface — soft sheathing, old flashing that was never properly lapped, or moisture staining that tells us a wall has been taking on water for longer than the homeowner realized. We address what we find before anything new goes up, because covering a moisture problem with new siding just hides it for a few more years instead of solving it.
Water-Resistive Barrier and Flashing
This step matters more than almost anything else in the whole project, and it's the one step a homeowner can't easily inspect once the siding is up. The water-resistive barrier goes on with correct overlaps, and flashing at every window, door, and penetration is integrated with that barrier in the right order — flashing under the barrier at the top, over it at the bottom — so water is always directed out and down rather than trapped behind the wall.
Hanging and Fastening
Course layout is planned before the first board goes up, so reveal lines stay consistent and courses don't end awkwardly at windows or corners. Fasteners go in at the manufacturer-specified spacing and depth for the product and our wind exposure, and joints are staggered so no single vertical line on the wall becomes a repeated weak point.
Trim, Caulking, and Final Walkthrough
Trim goes in last around the openings and corners, joints get sealed with the right sealant for a factory-finished board, and any field cuts get touched up with color-matched product rather than a generic paint that will visibly age differently than the ColorPlus finish around it. We walk the finished exterior with the homeowner before calling the job done, so any questions about the work get answered on-site rather than after we've moved to the next project.
Choosing Colors and Profiles for a Burlington Home
ColorPlus siding comes in a range of factory finishes, and most homeowners land somewhere between a traditional lighter neutral that reads clean against Skagit Valley's gray winter light, and a deeper gray, green, or blue tone that holds up visually against the evergreen tree cover common on Burlington lots. Lap siding profiles tend to suit older, more traditional homes in the area, while panel siding in a board-and-batten layout has become a popular way to give a more modern or farmhouse-style update without changing the home's actual footprint. We talk through profile and color choices with the specific house and lot in mind — a color that reads well on an open, sun-exposed wall can look different on a shaded north face — rather than picking from a swatch in isolation.
Cost Factors for a Burlington Hardie Siding Project
We don't publish blanket pricing because it wouldn't be an honest number — every home's condition, size, and detail level changes the real cost. The factors that consistently move a project up or down, though, are worth laying out plainly so you know what's actually driving the estimate you receive.
| Factor | How It Affects Cost |
|---|---|
| Condition behind the existing siding | Hidden moisture or sheathing damage found at tear-off adds repair scope before new siding goes on |
| Home size and wall complexity | More corners, gables, and penetrations mean more flashing detail and labor time |
| Profile and trim package | Board-and-batten or heavier trim detail generally runs higher than standard lap siding |
| ColorPlus versus primed | Factory ColorPlus adds cost up front but removes a future repaint cycle from the maintenance schedule |
| Site access | Tight lot lines, tree cover, or difficult staging can add labor time on an otherwise straightforward job |
Why a Crew That Already Works Burlington Matters
A crew that installs siding across Burlington and the rest of Skagit County on a regular basis has already seen how a shaded, north-facing wall on one lot ages differently than an open, south-facing wall two houses down — and adjusts flashing detail, joint treatment, and product recommendations accordingly. That kind of judgment builds up from doing the work repeatedly in this specific climate, not from a general specification sheet written for the whole country. It also means someone local is easy to reach if a warranty question comes up years after the job is finished, instead of tracking down a crew that only worked the area for one season and moved on.
- Ask whether the crew has manufacturer training specific to James Hardie products, not siding installation in general
- Ask how they'll handle flashing at your specific windows, doors, and roofline transitions before work starts
- Ask to see how they treat shaded versus sun-exposed walls differently in their installation plan
- Confirm current licensing, bonding, and insurance before signing anything
- Get a written scope of work and warranty terms you can read and understand, not a verbal promise
- Ask how long they've been doing this specific work in Skagit County, not just how long the company has existed
Keeping Hardie Siding Looking Right for the Long Haul
Correctly installed Hardie siding is low-maintenance, not zero-maintenance. A quick rinse once or twice a year clears off the salt film and general grime that builds up in this climate faster than it would further inland. Checking shaded, north-facing walls periodically for early moss growth and addressing it before it spreads keeps moisture from sitting against the surface for extended stretches. Keeping gutters clear ahead of the wet season prevents overflow from soaking siding and trim at the eaves, and a quick look at caulked joints every year or two catches small gaps before wind-driven rain finds them. None of this is a heavy lift, and a crew that installed the work correctly should be able to tell you exactly what to watch for on your specific house.
Get a Free, No-Pressure Estimate
If you're considering James Hardie siding for a home in Burlington, we're glad to take a look and give you a straight read on what your house actually needs, with no pressure attached. Reach out for a free estimate and we'll walk the property with you and talk through what we see.