 Anacortes Window
 Flounder Bay's Waterfront Exposure Is Hard on Siding
Flounder Bay sits close to the water on Fidalgo Island, and that proximity is exactly what makes siding repair here different from a job five miles inland in Anacortes. Homes near the bay take a steady, low-grade beating year-round: salt-laden air drifting off the water, driving rain pushed sideways by marine wind, and long stretches of gray, damp weather that never really let siding dry out between storms. None of that shows up as one dramatic event. It shows up as slow, compounding wear that homeowners often don't notice until a repair has quietly become a bigger project.
We've worked on enough homes in this part of Skagit County to know the failure patterns are consistent. Salt air accelerates corrosion on fasteners and metal flashing faster than it would in a dry inland climate. Constant moisture keeps wood-based products and their coatings under stress. And the shade and dampness that come with waterfront tree cover create ideal conditions for moss and algae to take hold on siding, trim, and the ground-level boards that stay wet the longest. A siding repair done without accounting for all three of these factors tends to fail again within a few seasons — which is money spent twice.
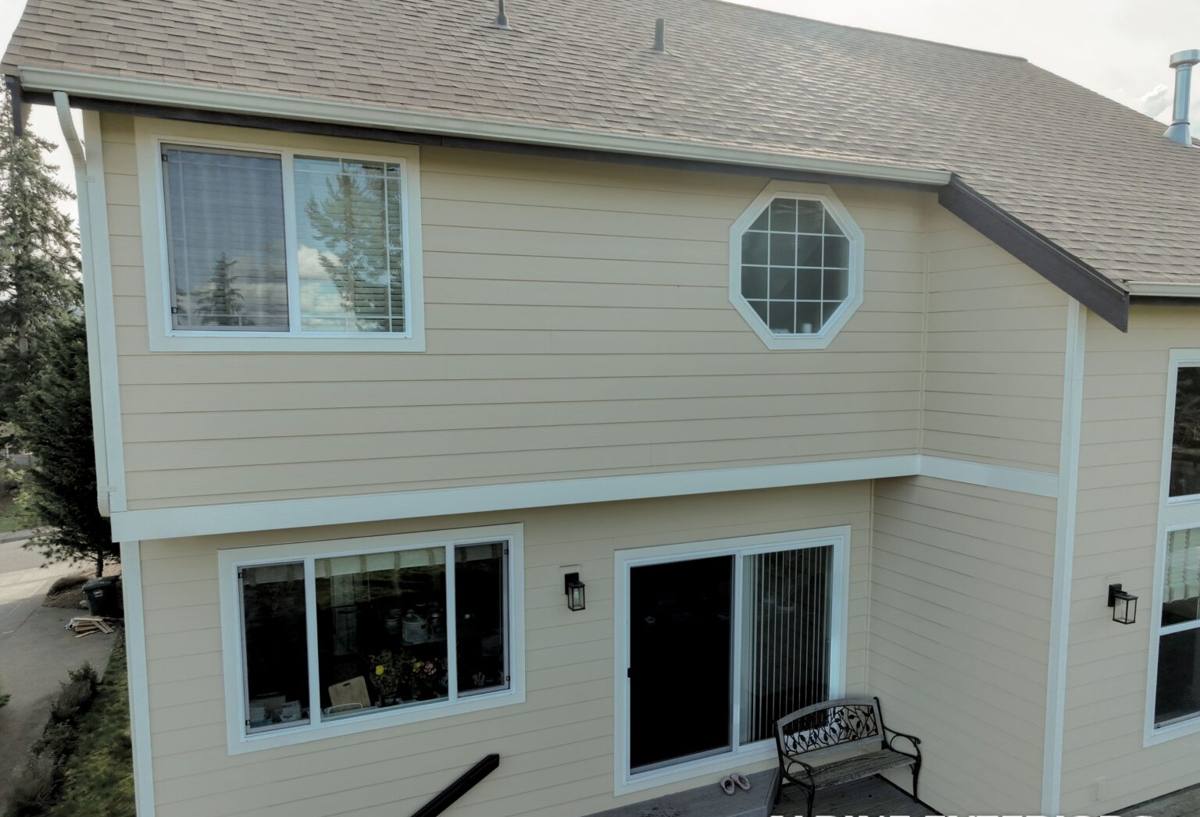
Why "Just Patch It" Rarely Works Long-Term Here
A lot of siding repair calls we get in this neighborhood start the same way: a homeowner noticed a soft spot, a stain, or a section that's started to bow, and they want it patched before it gets worse. That instinct is right — but a patch that only addresses the visible damage, without checking what caused it, is a short-term fix on a coastal home.
In a drier climate, a small crack or a loose panel might just be a small crack or a loose panel. Near Flounder Bay, that same gap is an entry point for wind-driven rain, and once water gets behind the cladding, it doesn't evaporate quickly in our climate — it sits against the sheathing and framing. By the time a stain or soft spot is visible from the outside, there's often more moisture damage behind the wall than the surface suggests. A repair that doesn't open things up enough to check for that is guessing.
What we look for on every repair
- Soft, spongy, or delaminating siding, especially near the bottom courses and around window and door trim
- Peeling, bubbling, or chalking paint or factory finish, which signals moisture or UV breakdown underneath
- Streaking, dark staining, or persistent moss and algae growth that won't wash off and keeps returning
- Rusted, popped, or backed-out nails and fasteners, common where salt air speeds up corrosion
- Gaps, cracks, or warping at panel seams, corners, and butt joints where water can track behind the cladding
- Cupping or buckling panels, which often means moisture has already reached the material from behind
- Deteriorated caulking or sealant around windows, doors, and penetrations like vents and hose bibs
- Musty smells, interior wall staining, or trim rot that suggests the damage has already worked its way inward
Finding two or three of these on a home isn't unusual for this area — it's the reason siding here needs more frequent inspection than it would in a drier part of the state.
What a Correct Siding Repair Actually Involves
A repair that's going to hold up on Flounder Bay needs to do more than replace what's visibly broken. It needs to correct the underlying moisture path, use materials and fasteners suited to a marine environment, and blend into the surrounding siding without creating a new weak point.
Matching materials without creating a new failure point
Whenever we replace a section of siding, we're solving two problems at once: durability and appearance. If the existing siding is an older wood-based, fiber cement, or vinyl product, we look for the closest available match in profile and exposure so the repaired section reads as part of the wall, not a patch. When an exact match isn't realistically available — which happens often on older homes — we'll talk through honest options with the homeowner rather than force a mismatch that will stand out and weather differently than the rest of the wall.
Fixing what's underneath, not just what's on top
Before any new siding goes up, we check the water-resistive barrier, flashing, and sheathing behind the damaged section. If the moisture barrier is torn, if flashing around a window or door is missing or installed backward, or if sheathing has softened, replacing the siding without fixing those layers just resets the clock on the same failure. Correct flashing detail — especially at window heads, horizontal joints, and anywhere two planes of the house meet — matters more on a waterfront lot than almost anywhere else in the county, because wind-driven rain finds those gaps far more often here than on a sheltered inland site.
Fasteners and hardware built for salt air
Standard fasteners corrode faster near open water. We use corrosion-resistant fasteners and hardware rated for coastal exposure, and we pay attention to fastener placement and spacing so panels stay properly secured through wind events without splitting or over-driving — a common cause of early siding failure on homes that see regular gusts off the bay.
Repair or Replace? An Honest Comparison
Not every problem calls for a full re-side, and not every problem is safely solved with a patch. Here's how we walk homeowners through that decision on the water:
| Factor | Repair Usually Makes Sense | Replacement Usually Makes More Sense |
|---|---|---|
| Extent of damage | Isolated to one or two wall sections | Recurring failures across multiple elevations |
| Underlying moisture barrier | Intact once opened up and inspected | Compromised, torn, or missing in multiple areas |
| Age of existing siding | Mid-life, otherwise performing well | Near or past its expected service life |
| Material match availability | Close match available for a clean blend | Original product discontinued or badly weathered by comparison |
| Pattern of moss/algae or staining | Localized, tied to a specific shaded or low-drainage spot | Widespread across the home, suggesting a systemic moisture issue |
| Homeowner's timeline for the home | Planning to stay, wants a targeted fix now | Planning ahead for a lasting, low-maintenance exterior |
We'll always give you the repair option when it's genuinely the right call — we're not trying to sell a bigger job than the house needs. But we'll also tell you plainly when a repair is a band-aid on a wall that's going to need real work again soon, because that's the more useful answer for a homeowner planning their budget.
Our Process for a Flounder Bay Siding Repair
- On-site assessment. We inspect the visible damage and probe adjacent areas, since salt-air and moisture damage rarely stays neatly contained to the spot that prompted the call.
- Opening up the wall where needed. If there's any sign moisture has gotten behind the cladding, we remove enough siding to check the barrier, flashing, and sheathing — not just the boards that look bad from the street.
- Honest scope and options. We explain what we found, what a repair will and won't solve, and — if the damage is widespread — what a replacement would look like, in plain terms with no pressure either direction.
- Correcting the moisture path first. Any torn barrier, missing flashing, or soft sheathing gets repaired before new siding goes back on. This step is the difference between a repair that lasts and one that doesn't.
- Installing matched, properly fastened siding. New material is cut, flashed, and fastened to shed water correctly at every seam and penetration, using hardware suited to a marine environment.
- Finish and cleanup. Paint, caulking, or factory-finish touch-up is matched as closely as possible, and the site is cleaned up before we call the job done.
What Drives the Cost of a Siding Repair Near the Water
| Cost Factor | Why It Matters on a Waterfront Home |
|---|---|
| Amount of hidden moisture damage | Rot found in sheathing or framing behind the siding adds carpentry work beyond the visible repair |
| Material availability and matching | Older or discontinued siding profiles may require special ordering or a broader repair area to blend well |
| Accessibility of the damaged area | Second-story sections, tight side yards, or areas near steep waterfront grades can add labor and equipment time |
| Flashing and barrier repairs | Correcting the moisture path behind the wall is necessary work, not an upsell, and it adds time to the job |
| Extent of fastener corrosion | Widespread rusted or failed fasteners often mean more panels need to come off than the original complaint suggested |
| Paint or finish matching | Blending a patch into weathered, sun-faded siding takes more care than repairing a newer wall |
We don't quote a repair without walking the specific problem areas first — coastal siding damage varies too much from house to house for a phone estimate to mean anything.
Why We Only Install James Hardie — Even on a Repair Job
When a repair uncovers damage that's widespread rather than isolated, or when a homeowner asks what we'd recommend for the long run, our answer is consistent: James Hardie fiber cement. It's the only siding product we install, and on a site like Flounder Bay, that standard exists for a reason.
Fiber cement doesn't feed moss and algae the way some wood-based and composite products can when they stay damp for extended periods, and it holds up to sustained moisture exposure without the swelling, softening, or delamination that drives a lot of the repair calls we get in wet, shaded, waterfront settings. Hardie's ColorPlus factory finish is baked on and warranted against the fading and peeling that salt air and UV exposure accelerate on field-applied paint. And Hardie's HZ5 product line is engineered specifically for climates with high moisture exposure — which describes a home a few hundred feet from Skagit County saltwater about as well as any spec sheet could.
We're not going to tell you that every wall we repair needs to become a full Hardie re-side — plenty of repairs are legitimately just repairs. But when a homeowner is choosing what to install on a wall that's already fought this exposure once and lost, we're going to recommend the product that's built to hold up to exactly this environment, and explain honestly why we don't install the alternatives on our own jobs.
Why Hiring a Crew That Already Works Flounder Bay Matters
Siding repair is a trade where local familiarity shows up in the quality of the work, not just the convenience of scheduling. A crew that regularly works near the water in Anacortes already knows how far wind-driven rain travels up a wall on an exposed elevation, which corners take the worst of the weather, and how much faster moss and salt corrosion move here compared to a sheltered inland lot. That's not something you learn from a general contracting background — it's something you learn from doing this specific work, on homes with this specific exposure, season after season.
There's also a practical side to hiring local: a Skagit County crew can get eyes on a problem quickly, understands the permitting and inspection expectations in Anacortes, and isn't guessing at what "normal wear" looks like on a waterfront home versus what's an actual failure worth addressing now. When you're dealing with an exterior that's under constant pressure from salt air, rain, and moss, that local track record is worth more than a lower bid from a crew that's never worked this close to the water.
Get an Honest Look at Your Siding
If you're seeing soft spots, staining, persistent moss, or failing caulk on a Flounder Bay home, it's worth having someone look at it before the damage spreads further behind the wall. We offer a free, no-pressure estimate — we'll tell you honestly whether you're looking at a straightforward repair or something bigger, and what we'd recommend either way. Use the form below to get started.